Summertime Crafts
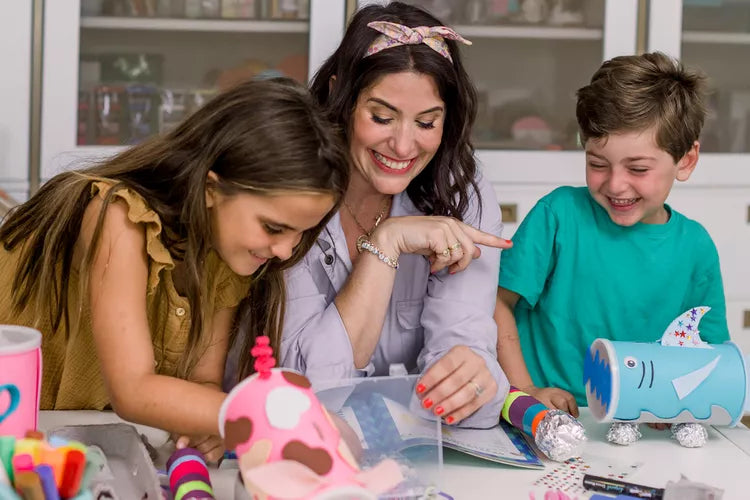
Parenthood can feel exhausting and sometimes overwhelming. During the Summer months you may find yourself feeling this way more frequently as your kids are looking to be entertained all day! Here are a few quick and easy crafts that you can do and you might even have a lot of the supplies already at home.

These pet cactus rocks are too cute, and they are really simple to make! Your kids will love this! The best part is you won’t have to worry about getting poked by the spikes of these cacti!
Supplies:
- Rocks - a flat surface works best
- Googly eyes
- Paint
- Mini TerraCotta Pots
- Hot Glue
Directions:
- Find rocks to use. You’ll want rocks that have a flat surface on one side so the eyes can go on smoothly
- Clean your rocks and allow them to dry
- Paint the rock green
- Once the green paint dries, use white paint to create different cactus designs
- After the paint has dried, glue on the eyes
- Finally, add your new pet to its new home in the terra-cotta pot!

This paper plate craft is fun but a great activity for practicing motor skills! This is the perfect craft for your little one to be introduced to sewing!
Supplies:
- Yellow paper plate
- Yellow yarn
- Plastic yarn needle
- Pony beads
- Construction paper
- Scissors
- Hole punch
- Tape
- Glue
Directions:
- Draw a circle on the back of your paper plate, then cut the circle out
- Punch holes along the edge of the circle
- Cut off a long piece of yarn and thread your plastic needle through
- Tape one end of the yarn to the back of the paper plate
- Now your little one can start sewing around the holes in the paper plate. Have them go up through a hole and then back down through another hole. Continue this process, through each of the holes in the paper plate
- Once you’ve sewn through all the holes in the paper plate, begin adding pony beads to each stitch. This will add a fund texture and color
- Once you are to the end of your yarn, take the needle off and tape the end of the yarn to the back of the paper plate
- Cut out yellow triangles from the construction paper, then glue them to the back of the paper plate

This paper spinner is such a fun craft, and it is really simple to create! This spinner toy makes all kinds of fun and beautiful patterns as it spins, your child is going to love it!
Supplies:
- Colored paper
- Wooden skewer
- Hot glue and a glue stick
Directions:
- Cut 8 strips of paper
- Cut 4 circles to attach the strips to
- Start gluing one end of each paper strip to 1 of your paper circles. Glue another paper circle on top to secure the strips
- Glue the other ends of the paper strips to another circle, and secure the final circle on top
- Put the skewer through the center of the circles of paper
- Using the hot glue, cover the top of the skewer to stop it from sliding and cover the point. You can also add glue to the underside of the top circle to stop the paper from sliding
- Move the skewer around the bottom hole enough to make the hole a bit wider - this will help the bottom spin freely
- Spin the skewer between your hands and watch the amazing show!

This is a fun craft to get your little one’s imagination flowing! While this specific example shows bow-tie noodles, you can use any type of noodle you have on hand. Your little one will have a great time creating something new and exciting!
Supplies:
- Chalk markers or paint
- Black sharpie
- White paper
- Bow-tie noodles
- Glue
Directions:
- First, paint your noodles and allow them time to dry
- Once the noodles are dry, you can cut, glue, or place the noodles to your paper
- Use the sharpie to add details to your scene

Ice cream and summer go hand-in-hand, so this craft screams summer! This fun activity can allow your little one to “play” and paint with their favorite treat. This craft also is easy enough that you can make different “flavors”.
Supplies:
- Paint, choose colors that match the flavor of ice cream your trying to paint
- Glue
- Shaving cream
- Cardstock paper
- Cardboard
- Scissors
- Markers
- Paintbrush
Directions:
- First mix Elmer’s glue with shaving cream until you get “stiff peaks”
- Add paint to reflect your ice cream flavor
- Cut a triangle out of the cardboard and draw the lines of a waffle cone, then glue to your cardstock
- Use a paintbrush to paint your ice cream scoops
- Paint details like sprinkles, a cherry on top, or chocolate chips

Celebrate a birthday, Juneteenth, Pride, Summer, or Independence Day by making a fun paper chain! This activity can be manipulated to fit the needs of your little one. For older children, you can have them write different words or phrases that encompass what it is you’re celebrating. For younger children, they may draw a picture on each link or not at all. This simple paper chain can be a fun visual representation of acceptance, unity, kindness, coming together, and so many other things.
Supplies:
- Scissors
- Colorful paper
- Glue, staples, or tape
Directions
- Cut strips of paper in the color theme your celebrating
- Juneteenth: green, black, and red
- Pride: red, orange, yellow, green, blue, purple, black, brown, white, pink, and light blue
- Independence Day: red, white and blue
- If your child is going to draw or write on the paper strips, do that step now
- Take your first paper strip and connect both ends with tape, glue, or staples
- Take the next paper strip, put it through your first link, connect the ends of the new strip
- Continue the last step until you’ve run out of paper strips or your chain is the length you’d like
- Hang it up!
We hope you give at least one of these crafts a try! Tag us with your pictures of your kiddos and their crafts! Happy Summer!


